
Fashion sketches, or fashion illustrations, is the way designers communicate or plan out their idea before it is constructed. Fashion sketches are used to help designers before the garment is sewn, but also can be an art form. Designers use many mediums to make fashion sketches. Some of these mediums include markers, acrylic paints, colored pencils, or even watercolors. Over the next few weeks, my posts will be about how to draw fashion sketches. This week, we will start out with the most important part of the sketch: the croquis. The croquis is the drawing of the model the design is drawn onto.
Materials you need:
- Pencil
- Thin marker or gel pen (preferably black)
- Nice eraser
- Post it, ruler or small piece of paper to make the head length with
- Optional: Picture of the human body for reference
Step 1: The human body is approximately 9 “heads” long. Find a piece of paper that will be able to fit onto the pages 9 times. I folded a post-it note, but you can also use a ruler. Draw a total of 10 lines so you split the paper into 9 parts. Leave some space at the top and bottom. Label each of the heads with their corresponding number. For example, “head 1, head 2, head 3, head 4…” Make sure your lines are very light because they will be erased later in the drawing. Draw a head into the 9 sections. To draw the head, draw a circle that fills up 3/4 of the area and a triangle or pentagon for the chin part.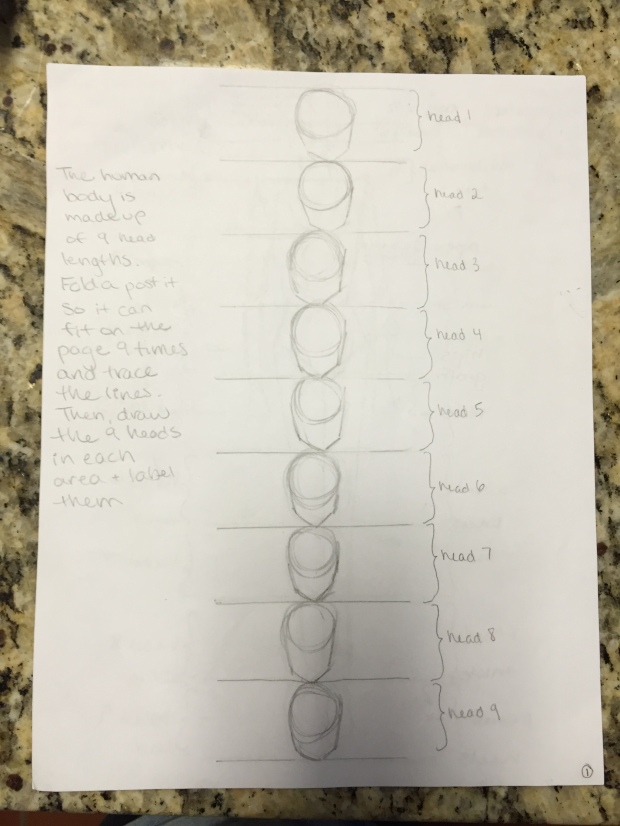
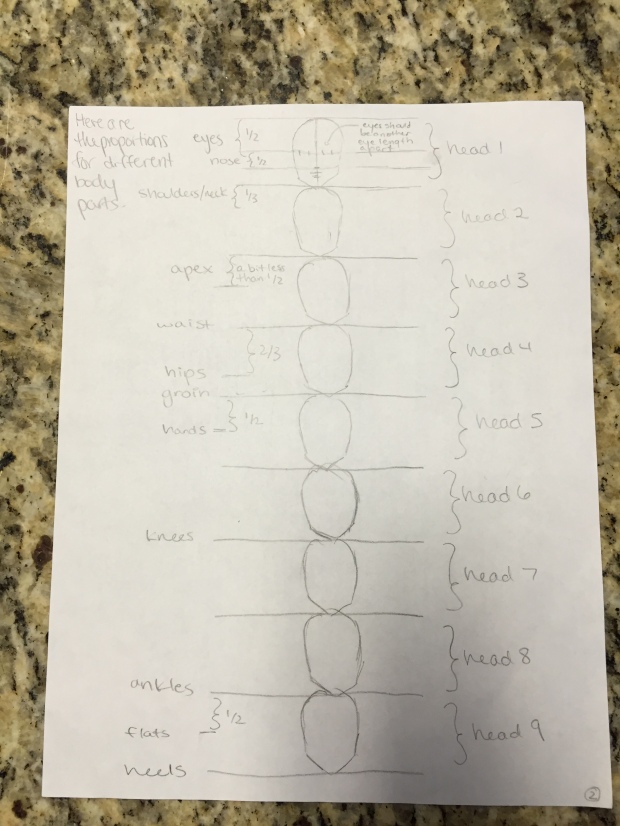
Step 2: Next, you need to mark where the different body parts fall on the head.
- Eyes- 1/2 way down on the 1st head. The space between the two eyes should be the same length as each eye.
- Nose- 3/4 of the way down on the 1st head
- Shoulders/ neck- 1/3 of the way down on the 2nd head
- Apex- a bit less than 1/2 way down on the 3rd head
- waist-line between head 3 and 4
- hips- 2/3 of the way down on the 4th head
- groin- the line between the 4th and 5th head
- hands- 1/2 way down on the 5th head
- knees- the line between the 6th and 7th head
- ankles- the line between the 8th and 9th head
- If the shoes are flat, the feet and 1/2 of the way down on the 9th head. If the shoes are heels, they end at the bottom of the 9th head.
Mark these lightly on the side of the body.
Step 3: Draw the basic outline of the body. It is mostly made of rectangles, triangles, etc. Don’t go for perfection- you can always fix it later. I start at the shoulders and mark the width I want them to be. It helps to draw a triangle from the shoulders to the groin. The triangle will jut out to make a pentagon around the 4th head. The legs get narrower the further down they go. The arms are also sets of rectangles. The elbow usually falls around the line between the 3rd and 4th head. 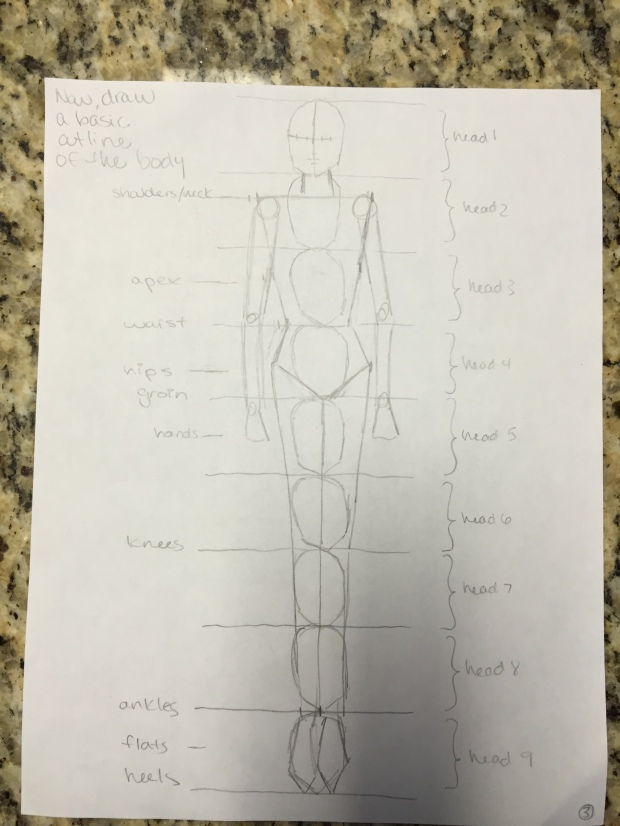
Step 4: Now, smoothen out your lines so the body looks more natural. The body has a lot of curves so make sure to acknowledge that. All you have to do is draw more natural lines around the existing shapes.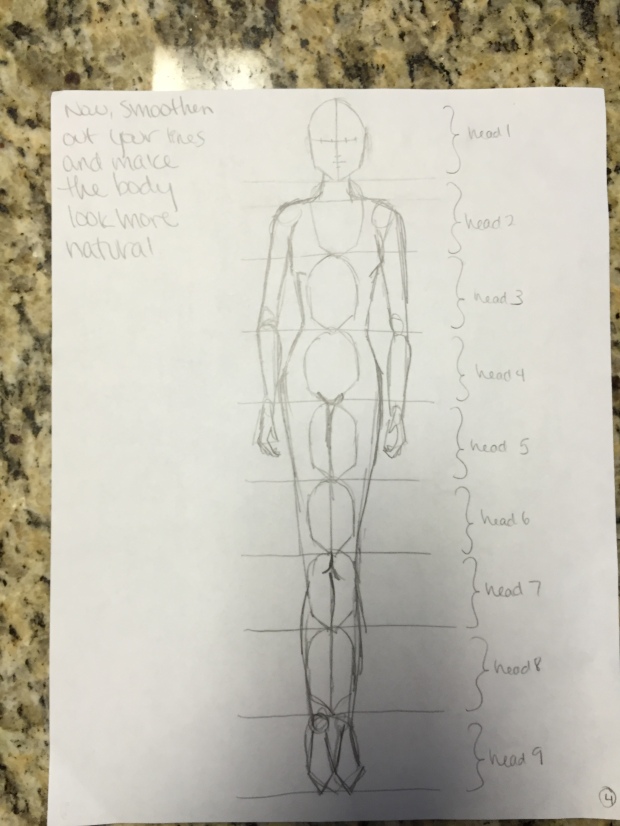
Step 5: Finally, erase all the excess lines you don’t need. Erase the heads, the shapes, the lines between the heads, the words on the outside, etc. This is why you drew lightly! Now, draw over the croquis with a thin marker or pen to show the final shape. You may want to scan and print this to use when you draw. This whole process takes practice, so don’t expect a perfect figure on your first try. You may or may not need to try this a few times to see how to do this. The more practice, the more realistic the croquis looks. You may also want to adjust the figure to be slightly different- whether it is longer and leaner legs or a bit wider and more realistic body. Everybody is different, so make sure that the model looks just how you envisioned your drawing.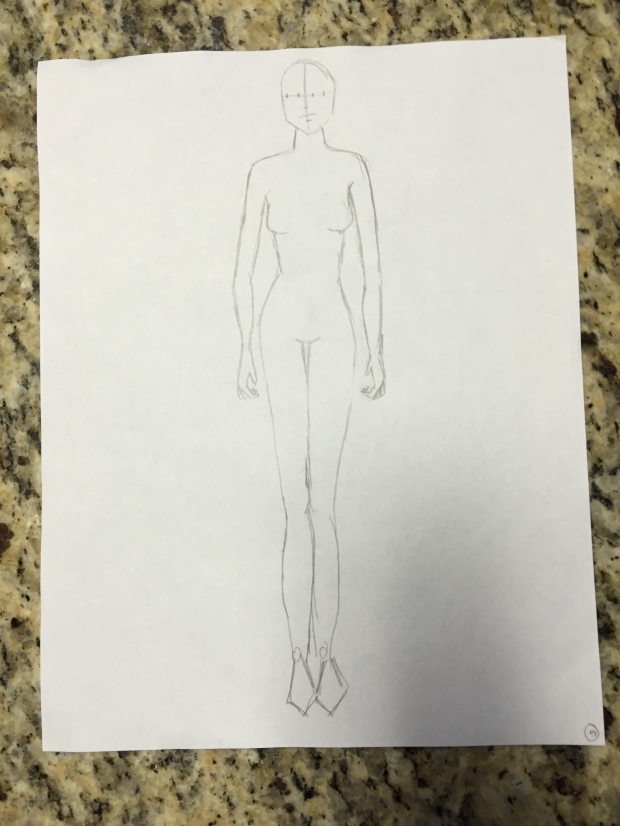
Below I included some pdf’s of my sketches for you to use or just for reference. Feel free to print them out and copy them.
If you tried this at home, please send your sketch to us at eloisefashion66@gmail.com and we will post it below.
Enjoy!
